

Locations
Vultr offers High Frequency instances in the Americas, Europe, Africa, Asia, and the Pacific.Americas
- Atlanta, US
- Chicago, US
- Dallas, US
- Los Angeles, US
- Miami, US
- New York, US
- Seattle, US
- Silicon Valley, US
- Toronto, CA
- Mexico City, MX
- Santiago, CL
Europe
- Amsterdam, NL
- Frankfurt, DE
- London, GB
- Manchester, GB
- Madrid, ES
- Paris, FR
- Stockholm, SE
- Warsaw, PL
Africa
- Johannesburg, ZA
Asia
- Bangalore, IN
- Delhi NCR, IN
- Mumbai, IN
- Tel Aviv, IL
- Osaka, JP
- Tokyo, JP
- Seoul, KR
- Singapore, SG
Pacific
- Melbourne, AU
- Sydney, AU
For the most up-to-date list, see the Vultr datacenter regions page.
Sizes
Vultr offers the following sizes of instances:High Frequency
Some sizes are only available in specific regions. Check the node creation form for the sizes available in your region.
Create a connection
To connect your Vultr account, open Settings > Providers and click Vultr in the Add Provider section. A dialog opens where you can enter a Vultr API key.Create a Vultr API key
Connecting Vultr requires an API key, which allows Nodex to perform certain actions in Vultr on your behalf. To create a new key:1
In the Vultr dashboard, open User Settings > API Access
If API access is disabled, click the Enable API Access button.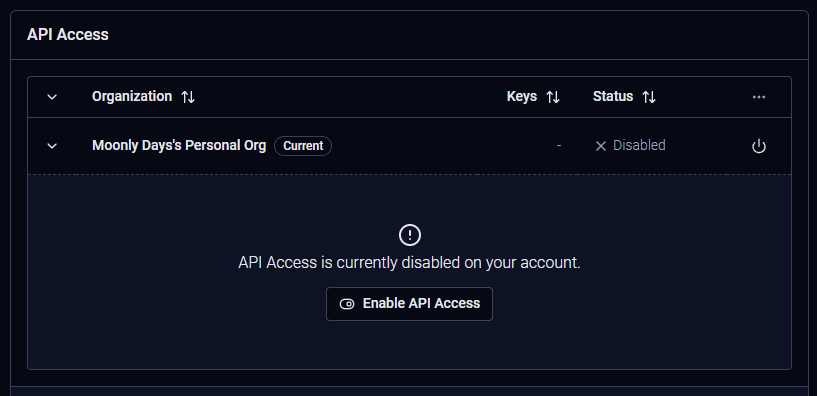
2
Create the key
Click the Create API Key + button.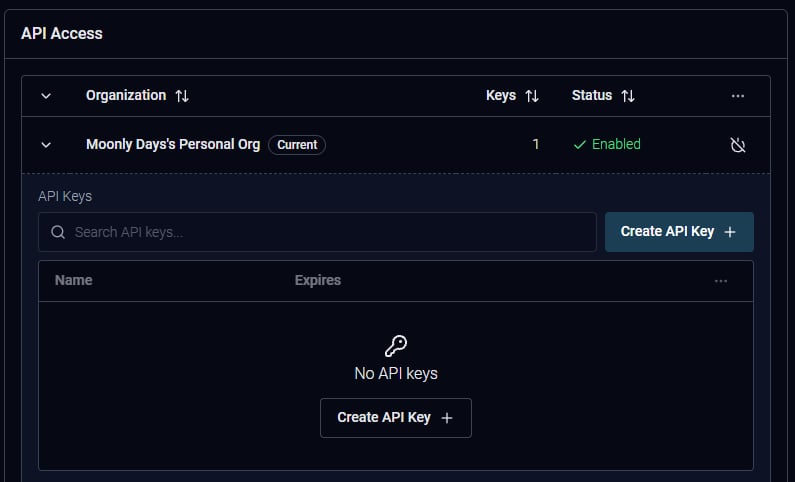
3
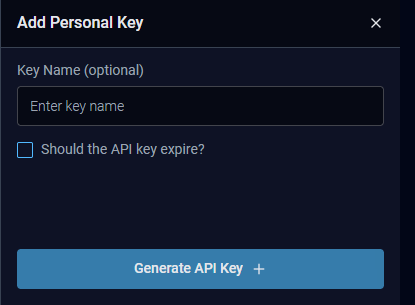
If prompted, customize your key
- Enter any name for the key. “Nodex” works well.
- Make sure the “Should the API key expire?” checkbox is cleared.
4
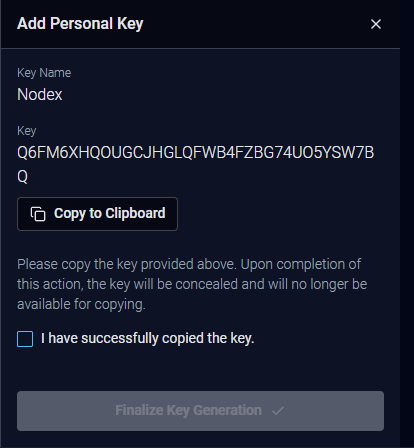
Copy the key
- Click the Copy to Clipboard button.
- Select the “I have successfully copied the key.” checkbox.
- Click the Finalize Key Generation button.
5
Paste the key into Nodex
Go back to Nodex and paste your API key into the key field. Do not click Submit yet.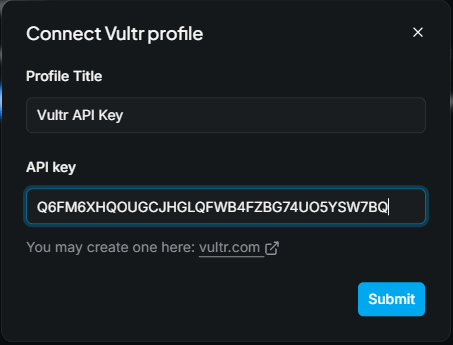
6
Add Nodex to the access control list
Vultr only accepts API requests from addresses on the access control list. Back in Vultr, on the API Access page: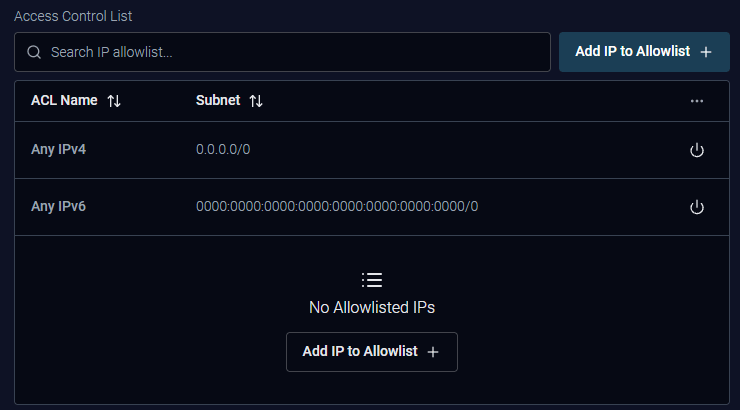
- Scroll down to the Access Control List section.
- Click Add IP to Allowlist + button.
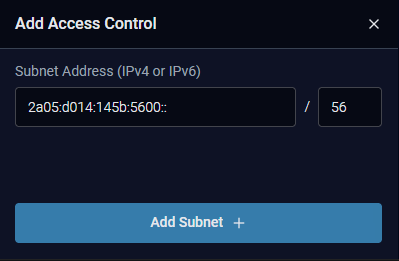
- Add the following IPv6 subnet:
- Click Add Subnet + button.
Without this entry, Vultr rejects requests from Nodex, and Nodex cannot create or manage instances in your account.
7
Submit the key
Go back to Nodex and click Submit.
8
Your Vultr account is now connected!